Description
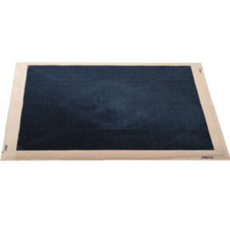
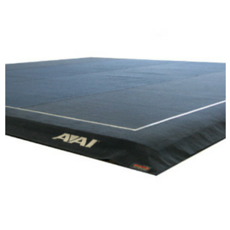
All American ELITE™ Artistic Floor Exercise System
From the training gym to the collegiate competition, this floor is the perfect fit for athletes of all levels.
- Meets USAG, NCAA and NFHS competition specifications
- All AAI floors are handmade to ensure the finest craftsmanship and quality
System Includes:
- 432-340 Spring Table
- 416-750 Foam
- 432-891 Border
- 432-510 Blue Carpet with White Carpet Border
- 13 D-Ring Floor Straps
In this gymnastics equipment video we will show you how to set up your AAI ELITE Floor Exercise.
BEFORE YOU BEGIN ASSEMBLY:
1. The AAI Floor Exercise consists of 25 packages
- 1 – 432341 – 2-board packages, containing the panels
- 1 – 432342 – Accessory package – 8 boxes of springs, 2 boxes of H-Channels and a box of straps
- 12 –432344 – 4-board packages, containing panels
- 1 – 432355 – retainer package, containing the bottom retainers
2. Check to make sure you have received all the packages and have the parts listed above.
3. The only tool you will need for assembly is a chalk line.
ASSEMBLY INSTRUCTIONS:
1. Unpack the panels, springs and retainers.
2. On each panel, insert a spring and bottom retainer into the top retainers on the bottom of the panel. Put the bottom retainer onto the spring, then push the other end of the spring into the top retainer. You may have a few extra springs and retainers when you are finished.
3. Determine where the floor is to be located. Using a chalk line, mark the outside border on two sides at right angles to one another. Refer to the figure on the following page for chalk line locations.
4. Put the first panel assembly in the corner where the two chalk lines meet. Place the panel in position with spring side down.
5. Put the next panel into place as shown. Connect the panels together using the aluminum connectors. To attach the connectors, slide the channel onto the first panel, then slide the second panel into the channel on the opposite side of the connector. Note the way the 12” H-channels w/Rivet are installed at the 3 board intersections. The rivet eliminates the movement of the channels during use. Failure to follow this procedure will damage your floor!!!
6. Refer to the figure below. This shows the entire floor layout. Follow the pattern shown. Connect the entire floor using the aluminum H-channels. The straight lines represent the 6” channel. The O’s represent the 3 board intersections where 12” channels w/rivet will be used. Please follow these instructions carefully to insure the best performance and durability of your floor and prevent damage to the floor panels.
7. Attach a strap with the sewn hook to the center of each panel as shown.
8. Attach the remaining hook with the D-rings to the opposite side of the floor. Refer to the figure at right. Thread the strap through the D-rings as shown, pull the strap tight, hooking the Velcro to itself. Repeat for all straps. Your final strap configuration is shown in the figure below.
9. Your floor is now ready to be covered with foam and carpet. AAI recommends using 2” of cross linked foam under your carpet.
USE OF THIS EQUIPMENT:
1. Your floor is designed to be used with a foam and carpet top surface. Do not use without a top surface.
2. Your floor is manufactured from a highly resilient composite material that is resistant to breakage and cracking. You must still, however, inspect your floor regularly to ensure the integrity of the panels.
3. Check the straps regularly and tighten as needed.
4. An optional border system is available that will provide additional protection around the working surface.
Contact American Gymnast for product information. For more information regarding gymnastics equipment, mats, gymnastics grips and supplies, go to http://wwww.american-gymnast.com.


Reviews
There are no reviews yet.